
Technology: Azure , Azure AD
Step 1:
Log into the Azure portal using link https://manage.windowsazure.com/ and log in with your credentials.
Step 2:
Select "Active Directory" option from side menu

Step 3:
Select an Active Directory and click on "Applications " as shown in below screen shot.

Step 4: Click on "Add" option from the bottom bar. This will provide you with option to register your application as shown below

Enter a name for your application registration.


Step 1:
Log into the Azure portal using link https://manage.windowsazure.com/ and log in with your credentials.
Step 2:
Select "Active Directory" option from side menu
Step 3:
Select an Active Directory and click on "Applications " as shown in below screen shot.

Step 4: Click on "Add" option from the bottom bar. This will provide you with option to register your application as shown below
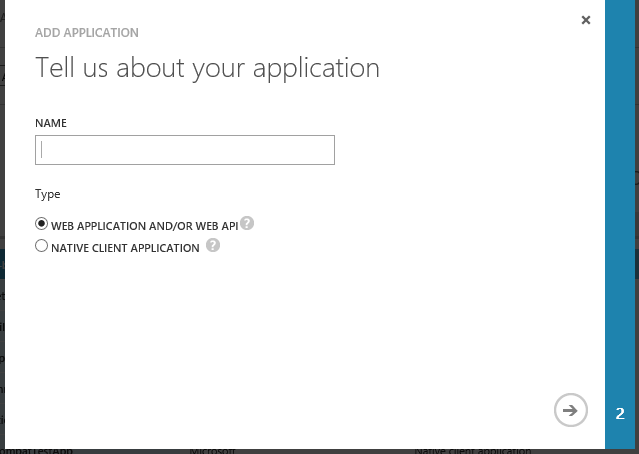
Enter a name for your application registration.
select an option based on your application type
Step 5: After entering details, click on "arrow" button to continue and you can see below screen.
for web applications:

Enter web app URL in "sign on URL".
Enter a unique name in "App ID URI"
Then click on "Tick" button which is present at the bottom right corner to complete the registration.
for Native client apps:

Enter Redirect URI which can get from your client code.
Then click on "Tick" button which is present at the bottom right corner to complete the registration.
Step 6:
Click on "Configure" tab and there you can find your app client ID as shown in below screenshots.

Note: If you have any doubts please ask in comments.
Nice post, very useful.
ReplyDelete